计划任务的Spring实现与手动实现
手写计划任务当然比不过简单又好用的SpringScheduled
使用Spring Scheduled的计划任务
关键方法
- 计算下一次匹配CRON表达式的时间
new CronSequenceGenerator("1 1 0 1 * ?").next(new Date());- 该方法用于计算下一次运行的到现在时间的时间差
org.springframework.scheduling.concurrent.ReschedulingRunnable#schedule();
实现代码
1
2
3
4
5
6
7
8
9
10
11
12
13
14
15
16
17
18
19
|
@Component
@EnableScheduling
public class ScheduleConfig {
public static final String CRON_EXPRESSION = "0 0 0 1 * ?";
@Scheduled(cron = CRON_EXPRESSION, zone = "Asia/Shanghai")
public void generateFormJob() {
System.out.println(new Date().toString() + " >>计划任务执行....");
}
}
|
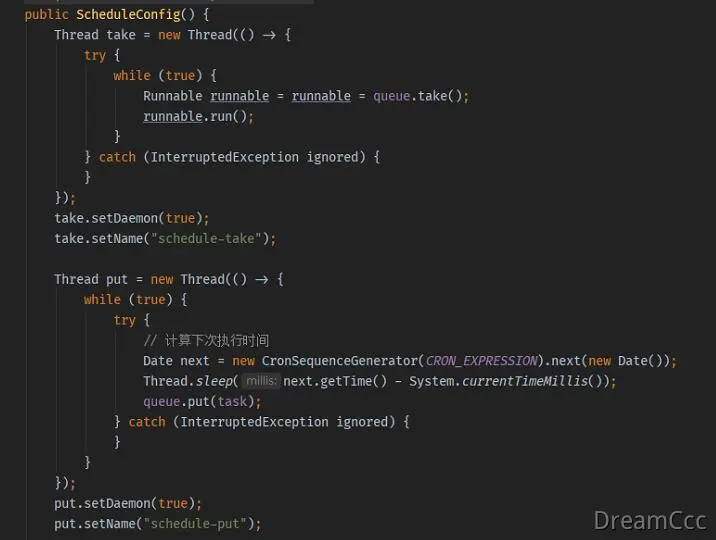
自己写的计划任务
思路
- 使用一个阻塞队列
- 使用一个线程去消费队列
- 使用一个线程在计算
现在到下次执行时间的时间差并睡到下次执行时间将Runable放入队列中消费
实现代码
1
2
3
4
5
6
7
8
9
10
11
12
13
14
15
16
17
18
19
20
21
22
23
24
25
26
27
28
29
30
31
32
33
34
35
36
37
38
39
40
|
private LinkedBlockingQueue<runnable> queue = new LinkedBlockingQueue<>();
private Runnable task = () -> {
System.out.println(new Date().toString() + " >>计划任务执行....");
};
@SuppressWarnings({"all", "AlibabaAvoidManuallyCreateThread"})
public ScheduleConfig() {
Thread take = new Thread(() -> {
try {
while (true) {
Runnable runnable = runnable = queue.take();
runnable.run();
}
} catch (InterruptedException ignored) {}
});
take.setDaemon(true);
take.setName("schedule-take");
Thread put = new Thread(() -> {
Runnable runnable = null;
try {
while (true) {
Date next = new CronSequenceGenerator(CRON_EXPRESSION).next(new Date());
Thread.sleep(next.getTime() - System.currentTimeMillis());
queue.put(task);
}
} catch (InterruptedException ignored) {}
});
put.setDaemon(true);
put.setName("schedule-put");
take.start();
put.start();
}
|